The Complete Guide To Transplanting Hydrangeas In Spring
The Complete Guide to Transplanting Hydrangeas in Spring
Hydrangeas are beautiful shrubs that can add a touch of elegance to any garden. However, they can also be quite susceptible to transplant shock. This is why it's important to know how to transplant hydrangeas properly, especially in the spring.
In this guide, we will walk you through the entire process of transplanting hydrangeas in the spring. We will cover everything from choosing the right time to transplant to preparing the soil to watering and caring for your newly transplanted hydrangeas.
When to Transplant Hydrangeas
The best time to transplant hydrangeas is in the spring, when the plant is still dormant. This will give it time to recover from the transplant shock and establish a new root system before the growing season begins.
If you live in a warm climate, you can also transplant hydrangeas in the fall. However, it's important to make sure that the ground is not too cold, as this can damage the roots.
Choosing the Right Spot
When choosing a spot to transplant your hydrangeas, it's important to consider the following factors:
- Sunlight: Hydrangeas need at least partial shade. Too much sun can scorch their leaves.
- Soil: Hydrangeas prefer moist, well-drained soil. If your soil is sandy or clayey, you may need to add some compost or other organic matter to improve drainage.
- Water: Hydrangeas need regular watering, especially during the first year after transplanting.
Preparing the Soil
Before you transplant your hydrangeas, you need to prepare the soil in the new location. This involves digging a hole that is at least twice as wide as the root ball of the hydrangea. The depth of the hole should be the same as the depth of the root ball.
Once you have dug the hole, add some compost or other organic matter to the bottom of the hole. This will help to improve drainage and provide nutrients for the hydrangea.
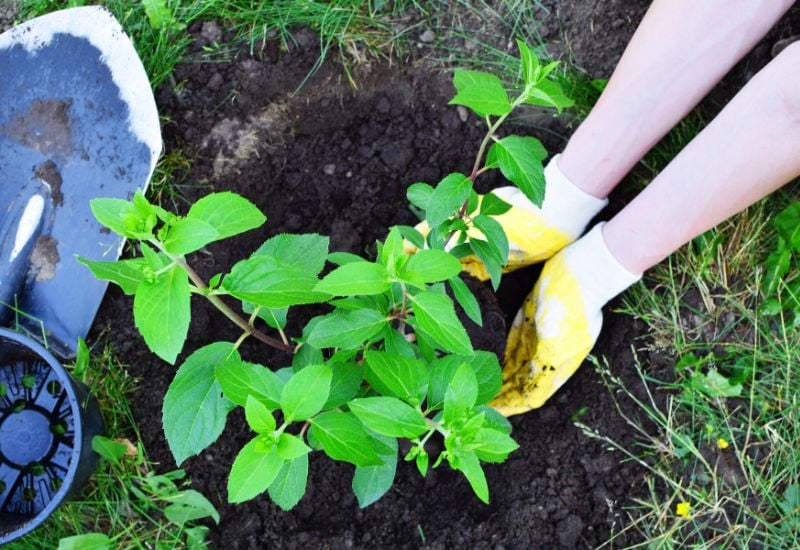
Transplanting the Hydrangea
Now it's time to transplant your hydrangea. Gently remove the hydrangea from its original location, being careful not to damage the roots. Place the hydrangea in the hole and backfill with soil.
Once the hydrangea is in the hole, tamp down the soil around it. Water the hydrangea thoroughly.
Caring for Your Newly Transplanted Hydrangea
After you have transplanted your hydrangea, you need to care for it properly. This involves watering it regularly, especially during the first year after transplanting. You should also fertilize your hydrangea once a month during the growing season.
With proper care, your hydrangea will thrive in its new location and bloom beautifully for years to come.
Conclusion
Transplanting hydrangeas in the spring is a relatively simple process. By following the tips in this guide, you can ensure that your hydrangeas will survive the transplant and thrive in their new location.
Spring is a great time to transplant hydrangeas. The weather is warming up, but the ground is still moist, which gives your hydrangeas the best chance of a successful transplant.
If you're planning on transplanting your hydrangeas in the spring, there are a few things you need to do to prepare. First, choose a new location for your hydrangeas that receives at least partial shade. Hydrangeas don't like full sun, especially in the afternoon.
Once you've chosen a new location, dig a hole that is twice as wide and as deep as the root ball of your hydrangea. Amend the soil in the hole with compost or other organic matter to improve drainage and fertility.
Gently remove your hydrangea from its original pot or location. Be careful not to damage the roots. If your hydrangea is large, you may need to enlist the help of a friend or family member.
Place your hydrangea in the hole and backfill with soil. Be sure to firm the soil around the roots to remove any air pockets. Water your hydrangea well and mulch around the base to help retain moisture.
For more detailed instructions on transplanting hydrangeas in the spring, please visit .
FAQ of transplanting hydrangeas in spring
- What is the best time of year to transplant hydrangeas?
The best time to transplant hydrangeas is in the spring, when they are actively growing but before they have started to bloom. This gives them time to establish their roots in their new location before the hot summer weather arrives. However, you can also transplant hydrangeas in the fall, as long as the ground is not frozen. 2. How do I prepare the new planting site?
The new planting site should be in full sun or partial shade, with well-drained soil. The soil should also be rich in organic matter. If the soil is poor, you can amend it with compost or other organic matter. The hole you dig should be twice as wide as the root ball of the hydrangea. 3. How do I transplant the hydrangea?
Gently dig up the hydrangea, being careful not to damage the roots. If the hydrangea is large, you may need to get help from someone else. Place the hydrangea in the hole and backfill with soil, tamping it down gently. Water the hydrangea thoroughly. 4. How do I care for the hydrangea after transplanting?
Water the hydrangea regularly, especially during the first few weeks after transplanting. You may also want to apply a light layer of mulch around the base of the hydrangea to help retain moisture and suppress weeds. Fertilize the hydrangea in the spring and fall with a balanced fertilizer. 5. What are some common problems with transplanting hydrangeas?
Some common problems with transplanting hydrangeas include transplant shock, root rot, and insect damage. Transplant shock can occur when the hydrangea is moved to a new location and stressed by the change in conditions. Root rot can occur if the hydrangea is planted in soil that is too wet or poorly drained. Insect damage can occur if the hydrangea is attacked by pests such as aphids, scale, or spider mites.
Image of transplanting hydrangeas in spring
- Image 1: A person digging up a hydrangea bush with a shovel. The hydrangea is in full bloom, with large, pink flowers.
- Image 2: A person watering a newly transplanted hydrangea bush. The soil around the bush is still loose, and the bush is slightly leaning.
- Image 3: A person fertilizing a newly transplanted hydrangea bush. The bush is now standing upright, and the leaves are starting to perk up.
- Image 4: A newly transplanted hydrangea bush, a few weeks after it was transplanted. The bush is now well-established, and the leaves are a deep green.

- Image 5: A hydrangea bush in full bloom, several months after it was transplanted. The bush is now much larger than it was when it was transplanted, and it is covered in beautiful flowers.
Post a Comment for "The Complete Guide To Transplanting Hydrangeas In Spring"